In this article, I’d like to show you how to create a secure Python REST API. Let’s assume you have a new bright idea of using users’ camera hardware to detect people in the pictures and make something cool with those people’s cutouts. (By the way, the concept itself is not flawed, so don’t be offended for ascribing it to you.) How can you get there? How to use API in Python?

Possible steps and algorithms
Techy people are often prone to reinvent the wheel.
Some of those you ask about REST API will surely brag about creating a new framework by redefining mathematical expressions from scratch. Sadly, that’ll take too long to make an elevator pitch.
Lazy engineers will eventually urge you to get a third-party service from a known cloud provider for an easy spin-up of your object detection requirements and use their simple REST API services just because they want to deploy tomorrow. But how about a daily subscription or pay-by-request fees? How long will we have to pay them before the first series of funding?
Young programmers, in turn, are frequently reluctant to pay more than a nominal server subscription cost — and we’ll analyze precisely their ideas in the following parts of the article. So, can we make a YOLO REST API for object detection by ourselves? By all means, yes!

Let’s start!
Those who dare to read along will learn about…
- installing dependencies;
- writing the first endpoint with FastAPI;
- fetching YOLOv7 object detection model and engine;
- writing an API service for object detection;
- securing the endpoint via a token.
Installing Python dependencies
To build an API with Python, you first need to install Python. There are at least two options: installing the dependencies globally on your system or setting up a virtual environment on a local folder.
I’ll go with the virtual environment option. Go ahead, install the virtual environment and activate it.
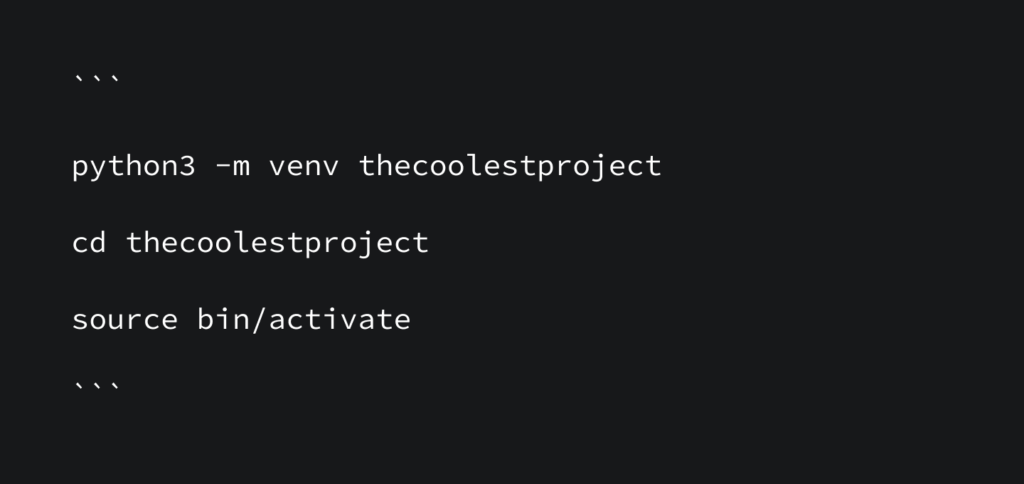
Congratulations! `thecoolestproject` folder is now your playground for every trial-and-error attempt.
We will build a simple but target-focused Python API making our service accessible to multiple applications and services.
Using FastAPI
FastAPI is one of the most scalable, robust, and easy-to-deploy Python REST API frameworks — that’s why I hadn’t any doubts about choosing it.
In this part, we will define a few endpoints with FastAPI, secure them via tokens, prepare simple documentation, and deploy the project.
Everything is settled, and we can now install the requirements (make sure that you are inside our `thecoolestproject` folder from now on)

This is pretty much what we need to set up the infrastructure. Let’s create a file named `main.py` and fill in the blanks with the following lines. The comments here help us understand the role of the particular code lines.

To get this file working, open up your terminal screen and navigate to the `thecoolestproject` folder. Type the following line to warm up the uvicorn server.

(Here, 8001 is our API port, main is the filename (without its extension), the app is the name we defined for our FastAPI application inside `main.py,` and the reload parameter releases the hot refresh feature each time we make changes on the project file.)
Let’s ensure we have a working API reachable in localhost from a given port. Simply navigate to http://localhost:8001/ and see that your root (`/`) endpoint is working.

Hint: on http://localhost:8001/docs, you see an auto-generated built-in documentation system with your endpoints, related developer documentation, and the ability to test your endpoints via some buttons without a prior testing mechanism installed. However, it’s not the coolest part yet.

By the way, when you navigate to http://localhost:8001/ you should see something like this:
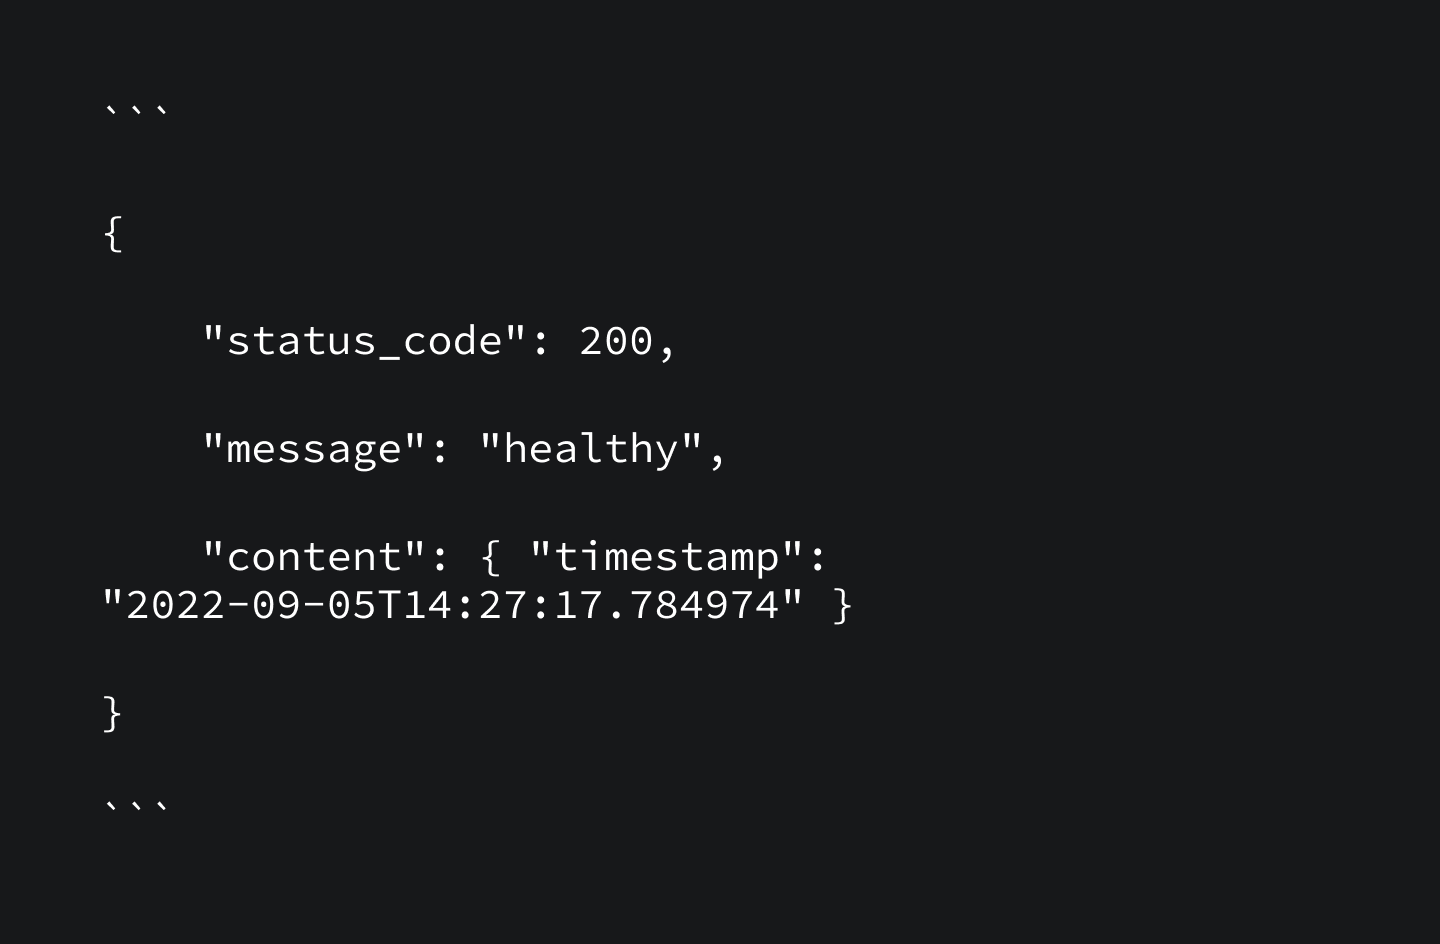
Congratulations! It’s not that hard to create an API for any purpose. At least it’s almost as simple as creating an API using Flask in Python or Express in Node.js and its implementation. There are always tradeoffs when you choose something — but comparing the pros and cons of similar-grade API frameworks is another big topic for discussion.
If you reach this sentence, I will give you the first star. Now, you can confidently dive into FastAPI’s docs (https://fastapi.tiangolo.com). Their authors have been working hard to make every bit understandable, so I’d guess it will be a smooth reading.
Object detection and how to achieve it
Now let’s start with the second part. We already have a working API, but it still does nothing we need! Let’s change the focus from FastAPI to something more hype and interesting. Yes, it’s the object detection part. Don’t get scared. It does not require you to be the most fabulous ML engineer to deploy such models immediately. The only tradeoff here is whether you need to understand everything bit by bit or use it as is and accept the limitations it brings to you. We’re just trying to build up an MVP. When you get the funding, I’d suggest you get a seasoned ML engineer and other staff to rule over the critical parts and develop your MVP into a full-scale product.
First, you need to fetch the following repo we prepared just for you. In the root folder, you have your main.py file. After fetching the repo, enter the folder and hit requirement installations to prepare your system for the latest and best object detector.
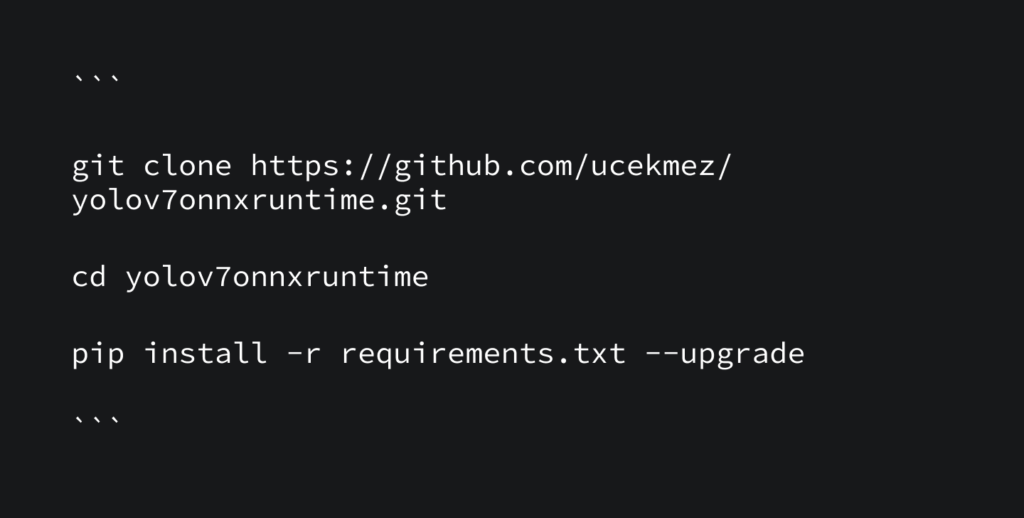
Once everything is settled, and you have installed yolov7onnxruntime on your folder, it’s high time to write our detection endpoint. Open your `main.py` and append the following code block into your file:
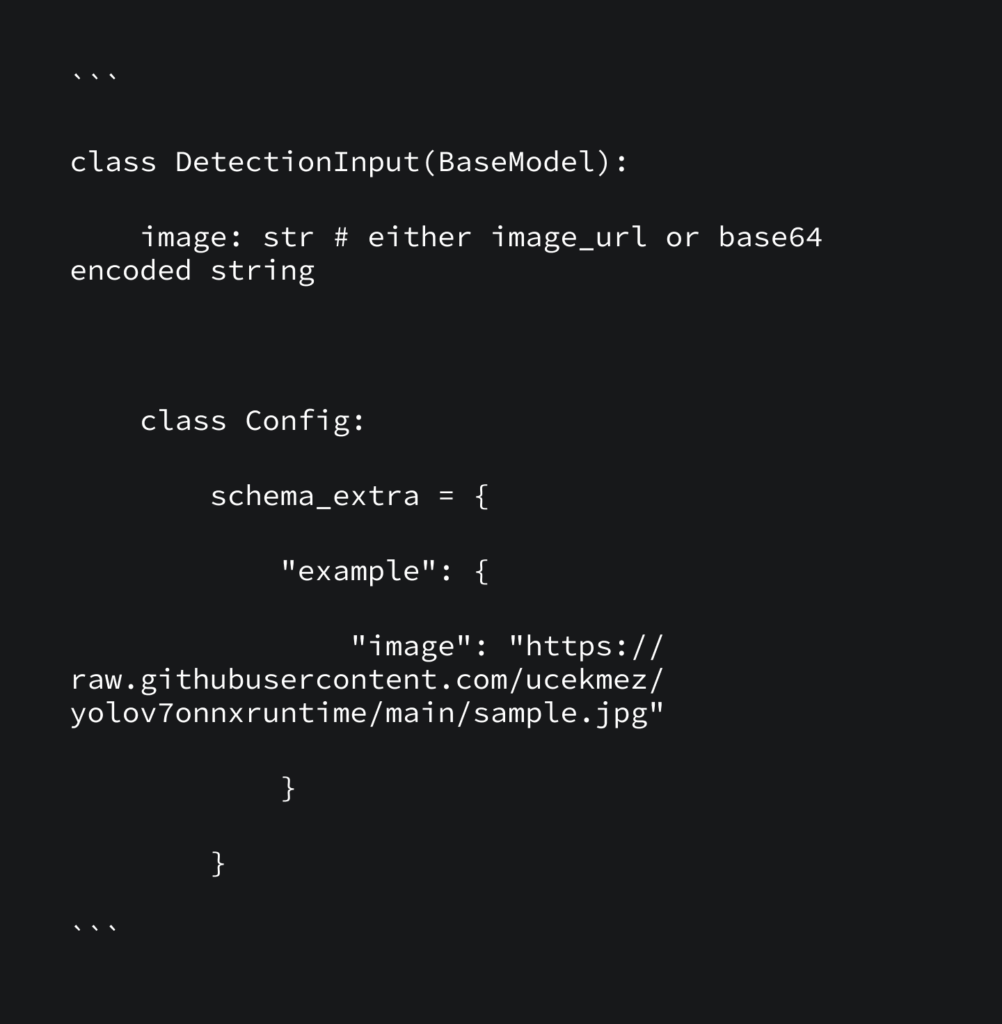
This block will be our input schema of the endpoint. It’s so simple since it has only one argument, which is the image we want to make detections on.
First, consider how we might send our images to the API service.
The initial options that come to mind are:
1) giving an image URL if the image is accessible by the API;
2) sending base64 encoded string that represents the actual image.
In this case, we assume that our API handles and differentiates if the given image parameter is something accessible from the internet or a base64 encoded one. The `yolov7onnxruntime` repo handles these two separations for you, where you only bring the image parameter and leave the handler to the repo.
Before writing the actual endpoint, let us import a few things to use in the endpoint function:
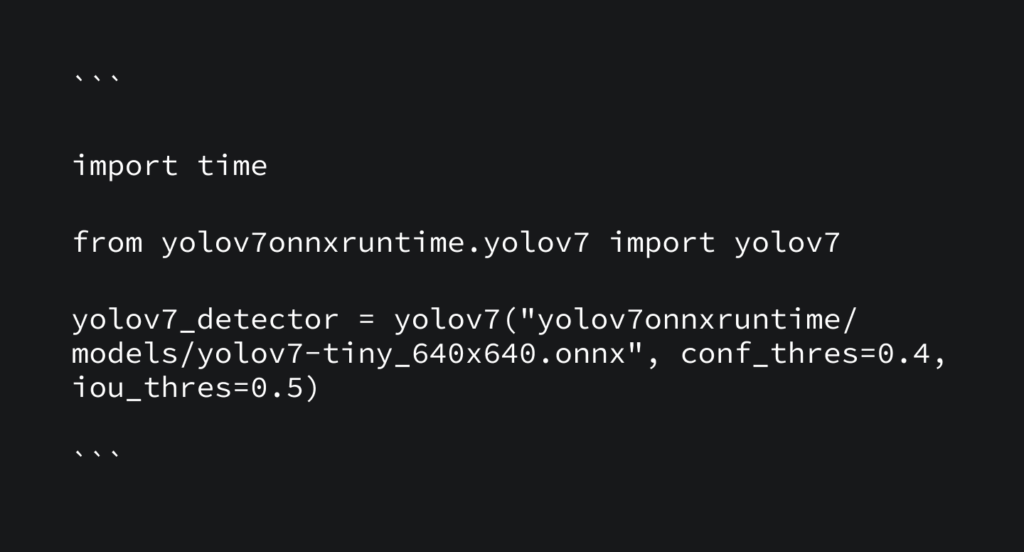
We will use `time` to calculate how much it takes to detect objects and `yolov7` as our object detection engine. The first argument of `yolov7` is the file path where our model file resides. The second is the threshold of when the detector should stop giving us results if it doesn’t feel confident about the results it finds. The last argument determines how the bounding box of an object should encircle the objects.
Let’s continue writing the actual endpoint:

That’s great. Now we’re approaching the end. Let’s test out the recent detection endpoint with some images. Open http://localhost:8001/docs and see where the endpoint is.
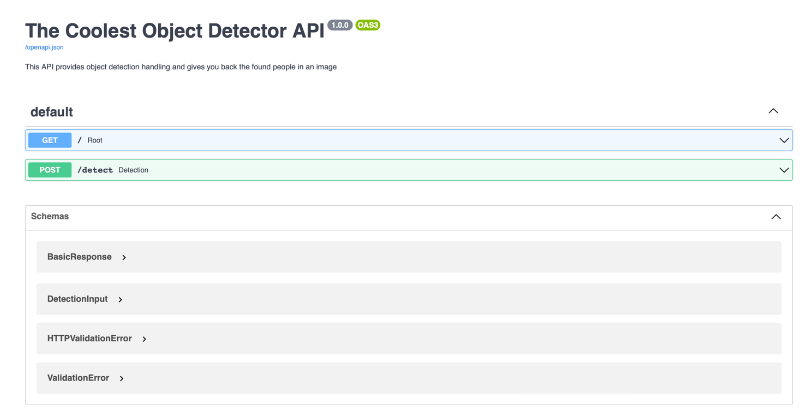
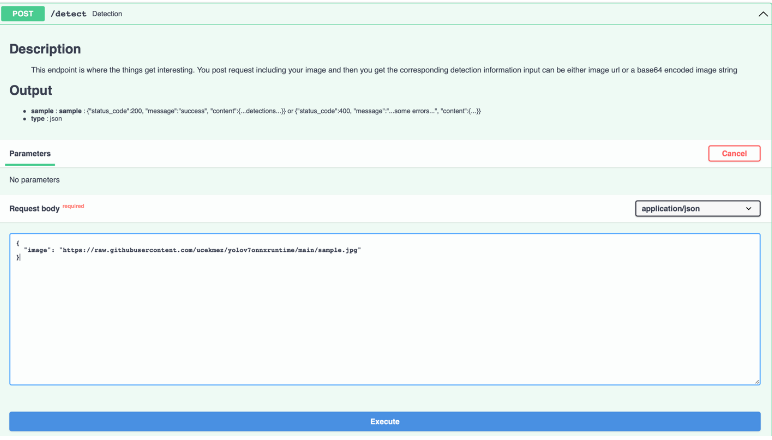
Hit the `try it out` button and ensure a valid image URL (or a base64 encoded image string) in the request body area.
In the end, you should see some results — similar to those shown in the code below. Here, `boxes` are the bounding box coordinates for each detected object, `scores` are the confidence scores the model thinks it got right, and `classes` are the class names in order. `computation_time` is the time required to read the input image and compute the detections.
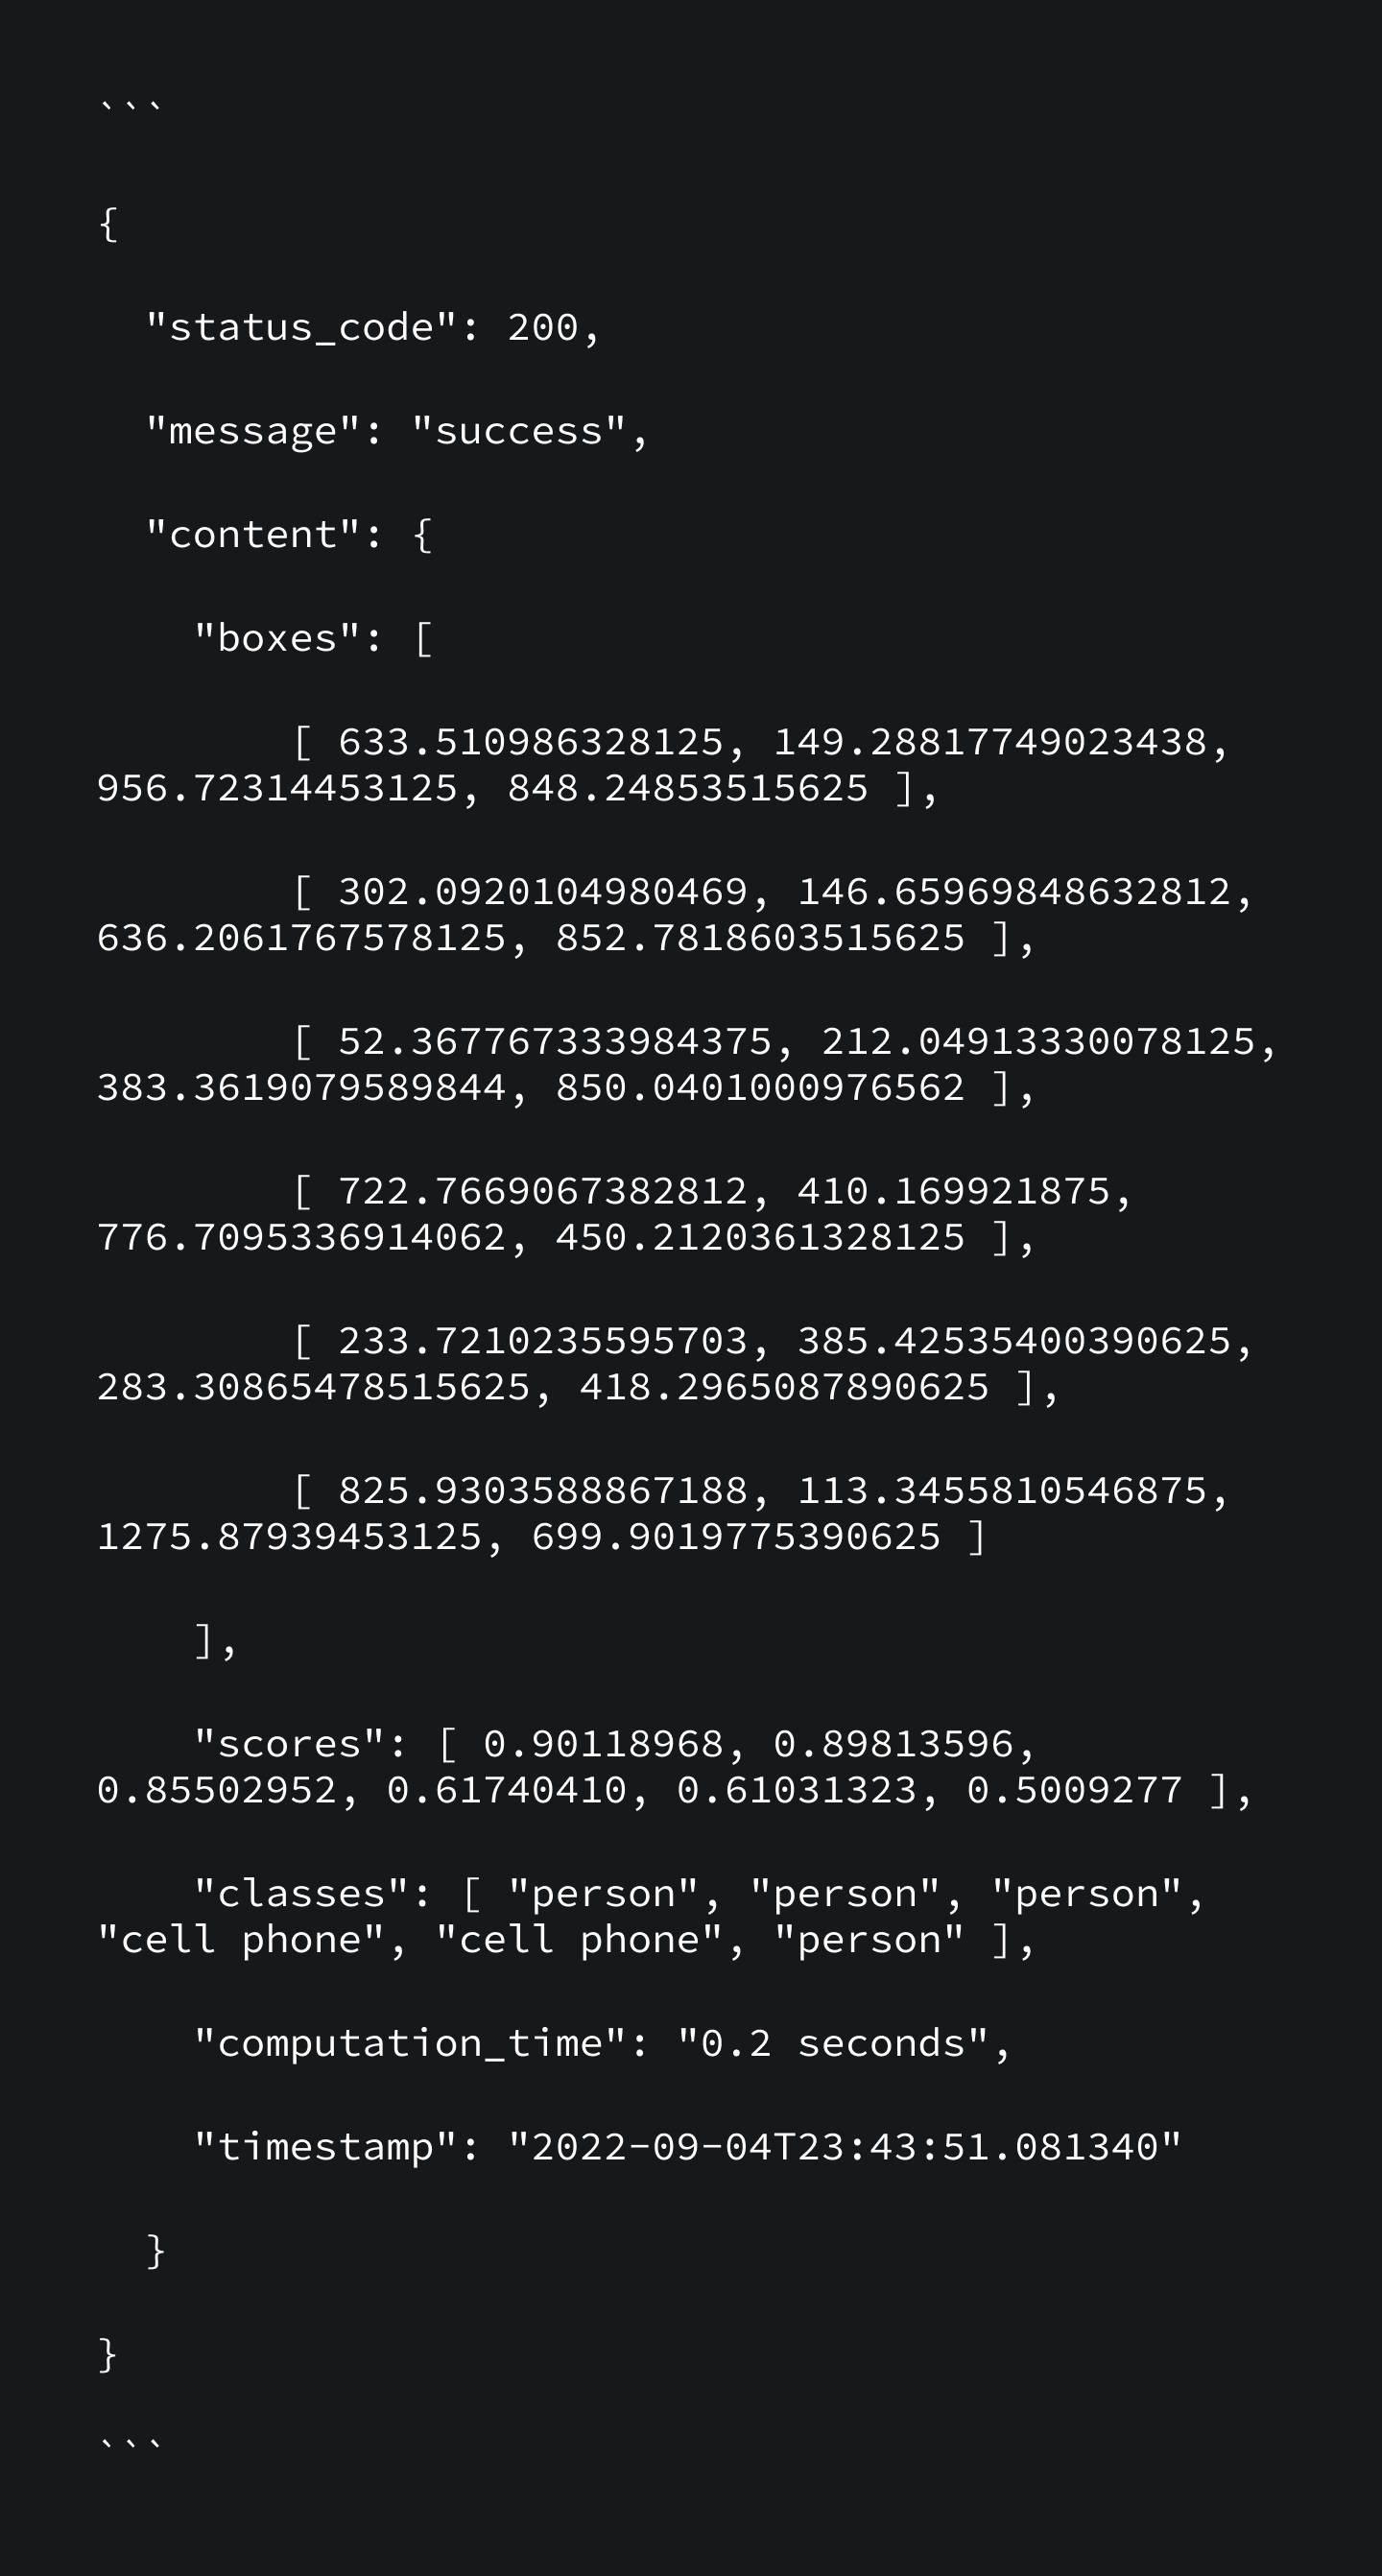
Woah! We’ve got our open-source on-premise object detector!
How long did it take to come to this line? Probably as much as subscribing to a cloud provider’s signup page.
API usage restriction
Here comes the last part. I have already heard numerous concerns about API usage. We wouldn’t want someone else consuming our computation power, especially if our resources are already minimal. How can we restrict the API usage, then?
No worries, I’ve got your back. Now, we’ll edit a few lines and turn your API into a token-restricted one. Afterward, only the ones attaching the correct authentication token will be able to use the detection endpoint.
Add the following few lines right before the detect endpoint definition in `main.py` (don’t forget to change the TOKEN variable to your taste).
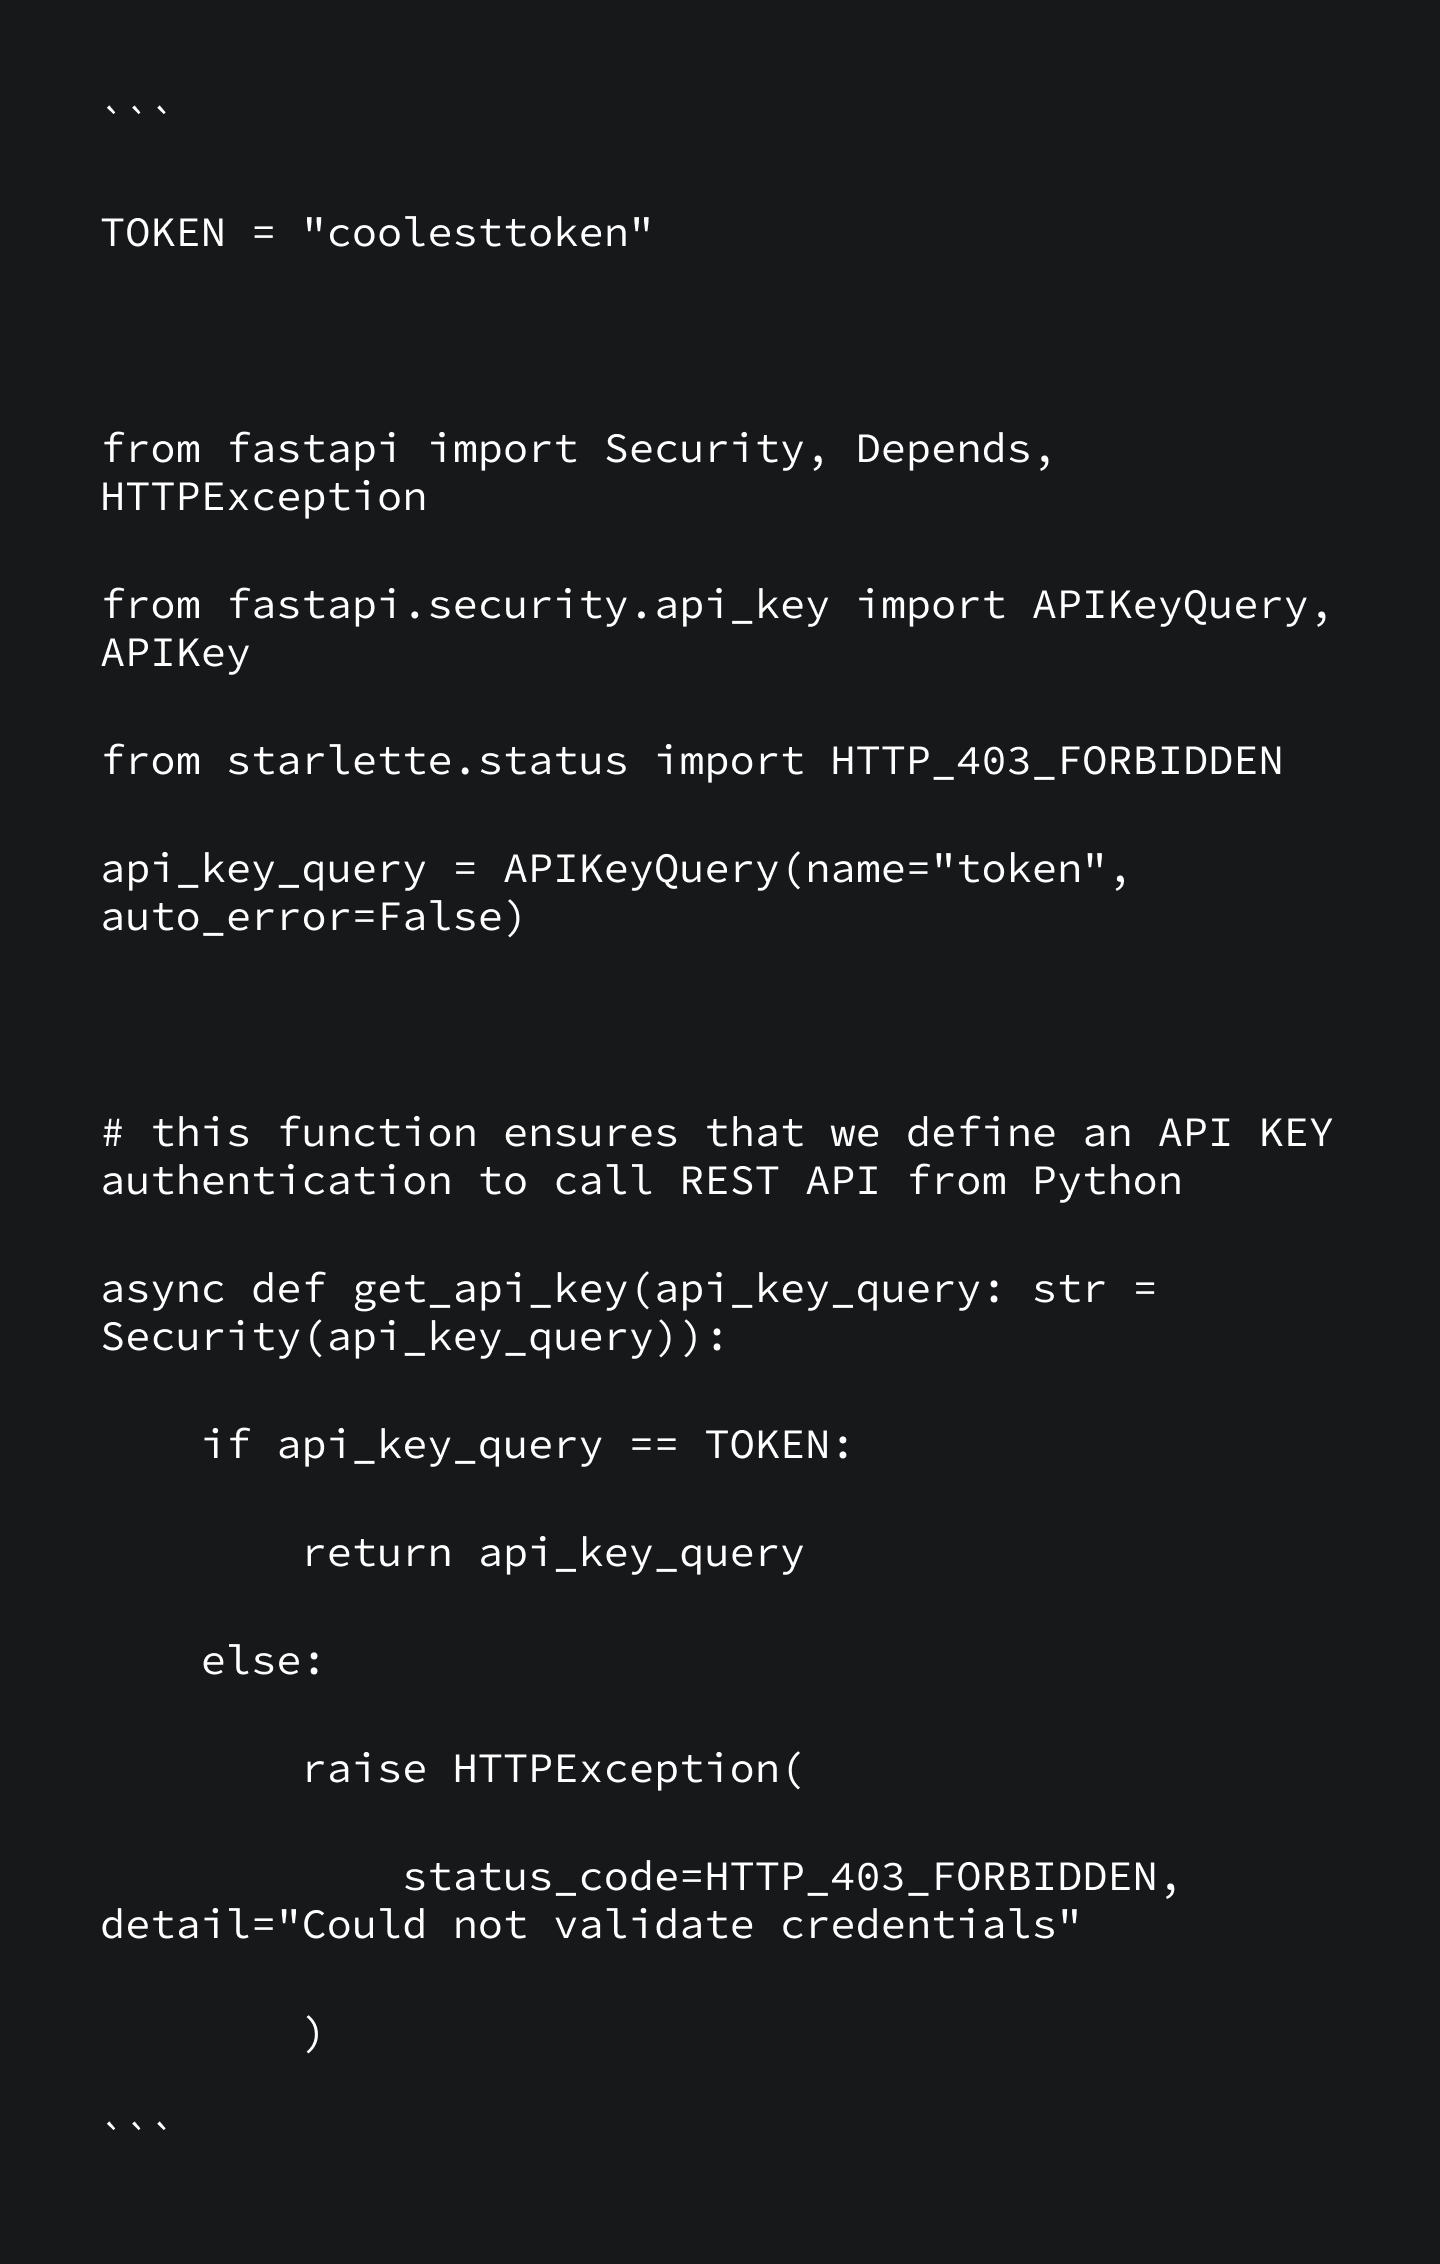
Now, we can add a dependency for our endpoint so that it requires you to enter a pre-defined token. Otherwise, it invalidates your API request in Python. You only edit your `detection` function to add one more input parameter. It should look like the following:
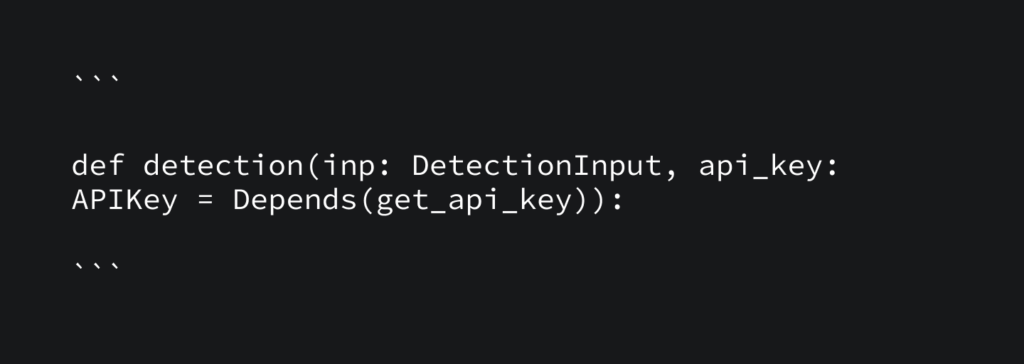
That’s all! Do you want to try that? Go ahead and open your /docs. You’ll see a small unlock icon on the right side of your detect endpoint.

Try to rerun the detect endpoint. You should hit a 403 error message saying your credentials are invalid.

That’s the message for outsiders. However, it is deemed different for you, the creator, the innovator, and the entrepreneur.
Just hit the unlock icon and enter your token in the popup.

Make sure your detect endpoint now includes a locked icon, just as below.

The service is alive and ticking! Filter out the exceptions — and go for using it!
Ready for the series A funding? I bet you are!


